タッチペンによる自由描画のサンプルです。
この方法でも描画できますが、ベストかどうかは?です。
-- タッチペンによる自由描画 TouchPen_FreeLine.lua

-- タッチペン座標の配列
PosX = {}
PosY = {}

counter = 0	-- 繰り返し回数
White  = Color.new(31, 31, 31) -- 白(ホワイト)

while not Keys.newPress.Start do

 	Controls.read()
 	startDrawing()

 	screen.print(SCREEN_UP, 6 * 5, 8 * 3 , "mode")
 	screen.print(SCREEN_UP, 6 * 5, 8 * 5, "Stylus.X")
 	screen.print(SCREEN_UP, 6 * 5, 8 * 6, "Stylus.Y")
	screen.print(SCREEN_UP, 6 * 5, 8 * 8, "Stylus.deltaX")
 	screen.print(SCREEN_UP, 6 * 5, 8 * 9, "Stylus.deltaY")

	screen.print(SCREEN_UP, 6 * 5 ,8 * 12, "PosX,Y CLS")

	screen.print(SCREEN_UP, 6 * 5, 8 * 15, "START Click Exit")

	-- mode Stylus.held タッチペンが押されている場合
	if Stylus.held then
		screen.print(SCREEN_UP, 6 * 20, 8 * 3 , "Stylus.held")
		screen.print(SCREEN_UP, 6 * 20, 8 * 5 , Stylus.X)
 		screen.print(SCREEN_UP, 6 * 20, 8 * 6 , Stylus.Y)
		screen.print(SCREEN_UP, 6 * 20, 8 * 8 , Stylus.deltaX)
 		screen.print(SCREEN_UP, 6 * 20, 8 * 9 , Stylus.deltaY)

		-- タッチペンの座標記憶
		counter = counter + 1
		PosX[counter] = Stylus.X
		PosY[counter] = Stylus.Y
	end

	-- PosX,Y の配列を消去
	if Keys.newPress.A or Keys.held.A then
		PosX = nil -- 配列の初期化(もっといい方法があると思われるが?)
		PosY = nil
		PosX = {}
		PosY = {}
		counter = 0
	end

	-- タッチペンの座標記憶位置を描画
	-- conter値が多くなると動作が遅くなる
	for i = 1 , counter do
		screen.drawLine(SCREEN_DOWN, PosX[i], PosY[i], PosX[i] + 1, PosY[i] + 1, White)
	end

 	stopDrawing()

end

PosX = nil
PosY = nil
counter = nil
White  = nil
実行例
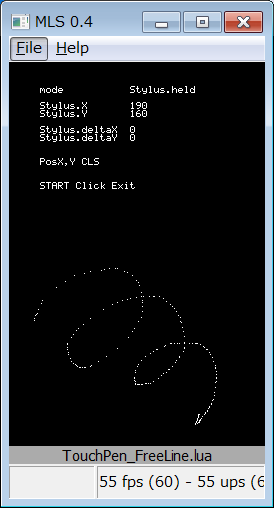
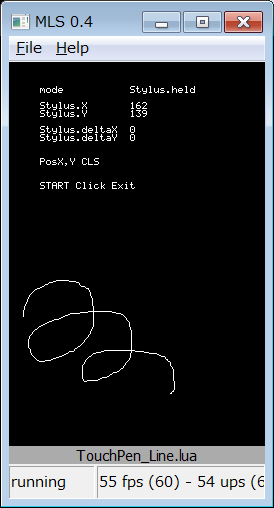
前のサンプルは、ペンの座標を取得の間隔の点描画になってしまいます。それをペンの座標同士を繋ぐことによって、より自由曲線らしく見えるようになります。
-- タッチペンによるLine描画 TouchPen_Line.lua

-- タッチペン座標の配列
PosX = {}
PosY = {}

counter = 0	-- 繰り返し回数
White  = Color.new(31, 31, 31) -- 白(ホワイト)

while not Keys.newPress.Start do

 	Controls.read()
 	startDrawing()

 	screen.print(SCREEN_UP, 6 * 5, 8 * 3 , "mode")
 	screen.print(SCREEN_UP, 6 * 5, 8 * 5, "Stylus.X")
 	screen.print(SCREEN_UP, 6 * 5, 8 * 6, "Stylus.Y")
	screen.print(SCREEN_UP, 6 * 5, 8 * 8, "Stylus.deltaX")
 	screen.print(SCREEN_UP, 6 * 5, 8 * 9, "Stylus.deltaY")

	screen.print(SCREEN_UP, 6 * 5 ,8 * 12, "PosX,Y CLS")

	screen.print(SCREEN_UP, 6 * 5, 8 * 15, "START Click Exit")

	-- mode Stylus.held タッチペンが押されている場合
	if Stylus.held then
		screen.print(SCREEN_UP, 6 * 20, 8 * 3 , "Stylus.held")
		screen.print(SCREEN_UP, 6 * 20, 8 * 5 , Stylus.X)
 		screen.print(SCREEN_UP, 6 * 20, 8 * 6 , Stylus.Y)
		screen.print(SCREEN_UP, 6 * 20, 8 * 8 , Stylus.deltaX)
 		screen.print(SCREEN_UP, 6 * 20, 8 * 9 , Stylus.deltaY)

		-- タッチペンの座標記憶
		counter = counter + 1

		PosX[counter] = Stylus.X
		PosY[counter] = Stylus.Y
	end

	-- mode Stylus.released タッチペンが放された場合
	if Stylus.released then
		screen.print(SCREEN_UP, 6 * 20, 8 * 3 , "Stylus.released")
		screen.print(SCREEN_UP, 6 * 20, 8 * 5 , Stylus.X)
 		screen.print(SCREEN_UP, 6 * 20, 8 * 6 , Stylus.Y)
		screen.print(SCREEN_UP, 6 * 20, 8 * 8 , Stylus.deltaX)
 		screen.print(SCREEN_UP, 6 * 20, 8 * 9 , Stylus.deltaY)

		-- タッチペンの座標記憶
		counter = counter + 1
		-- 放されたことを9999で表現
		PosX[counter] = 9999
		PosY[counter] = 9999
	end

	-- PosX,Y の配列を消去
	if Keys.newPress.A or Keys.held.A then
		PosX = nil -- 配列の初期化(もっといい方法があると思われるが?
		PosY = nil
		PosX = {}
		PosY = {}
		counter = 0
	end

	-- タッチペンの座標記憶位置を描画
	-- conter値が多くなると動作が遅くなる
	for i = 1 , counter -1  do
		-- 放された場合以外は描画
		if PosX[i]  ~= 9999 and PosX[i + 1]  ~= 9999 then
			screen.drawLine(SCREEN_DOWN, PosX[i], PosY[i], PosX[i + 1] , PosY[i + 1] , White)
		end
	end

 	stopDrawing()

end

PosX = nil
PosY = nil
counter = nil
White  = nil
実行例
最終更新:2010年11月22日 22:26