R入門
画像
最終更新:
r-intro
目次
画像ファイルを読み込む
imagerパッケージのload.image関数を使う。以下の例ではコマンドプロンプトでImageMagickのロゴの画像をあらかじめ作成し、それをカレントディレクトリに置いてある。
>magick logo: magicklogo.png
> library(imager)
> img <- load.image("magicklogo.png")
> print(img)
Image. Width: 640 pix Height: 480 pix Depth: 1 Colour channels: 3
> plot(img)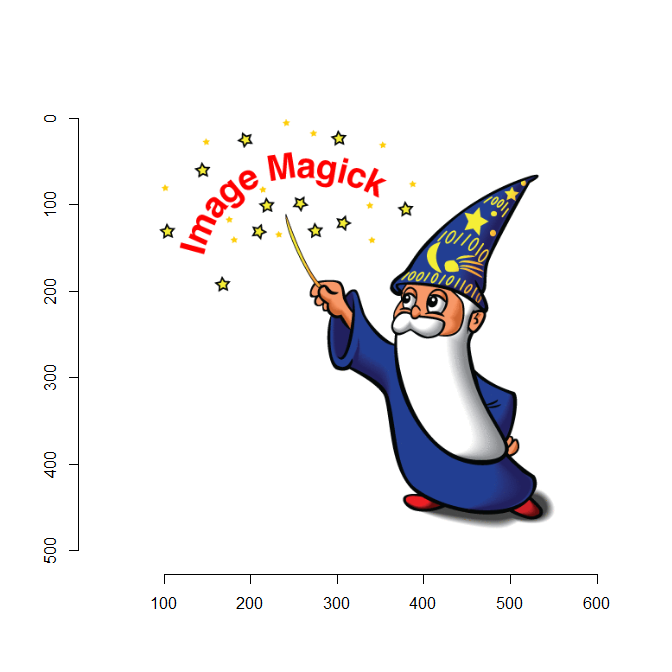
画像ファイルを連結する
Rでは画像ファイルは配列(raster array、ラスタ配列)として扱う。各要素の型は数値。そのため、数値型の配列を操作することで、画像ファイルの連結を簡単に行うことができる。
以下が縦方向に連結する関数。
bindRra <- function(ra1, ra2) {
  w1 <- dim(ra1)[2]
  h1 <- dim(ra1)[1]
  d1 <- dim(ra1)[3]
  w2 <- dim(ra2)[2]
  h2 <- dim(ra2)[1]
  d2 <- dim(ra2)[3]
  rra <- array(0, dim = c(h1 + h2, max(w1, w2), max(d1, d2)))
  rra[1:h1, 1:w1, 1:d1] <- ra1[1:h1, 1:w1, 1:d1]
  rra[(h1 + 1):(h1 + h2), 1:w2, 1:d2] <- ra2[1:h2, 1:w2, 1:d2]
  return(rra)
}
以下が横方向に連結する関数。
bindCra <- function(ra1, ra2) {
w1 <- dim(ra1)[2]
h1 <- dim(ra1)[1]
d1 <- dim(ra1)[3]
w2 <- dim(ra2)[2]
h2 <- dim(ra2)[1]
d2 <- dim(ra2)[3]
rra <- array(0, dim = c(max(h1, h2), w1 + w2, max(d1, d2)))
rra[1:h1, 1:w1, 1:d1] <- ra1[1:h1, 1:w1, 1:d1]
rra[1:h2, (w1 + 1):(w1 + w2), 1:d2] <- ra2[1:h2, 1:w2, 1:d2]
return(rra)
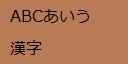
}以下の画像で試してみる。
pngimage.png
> library(png)
> ra <- readPNG("pngimage.png")
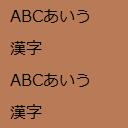
> ratate <- bindRra(ra, ra)
> writePNG(ratate, "tate.png")
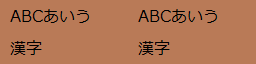
> rayoko <- bindCra(ra, ra)
> writePNG(rayoko, "yoko.png")tate.png
yoko.png
画像ファイルの一部分を切り出す
以下の関数を使えばよい。使い方は以下のとおり。
clipRa(ラスタ配列, 横方向の開始位置(1~), 縦~, 抜き出す幅, 抜き出す高さ)
いずれも指定の数値はピクセル単位で。
clipRa <- function(ra, xp, yp, wid, hei) {
  rra <- array(0, dim = c(h, w, dim(ra)[3]))
  xrg <- xp:min(dim(ra)[2], xp + w - 1)
  yrg <- yp:min(dim(ra)[1], yp + h - 1)
  zrg <- 1:dim(ra)[3]
  rra <- array(0, dim = c(h, w, length(zrg)))
  rra[yrg, xrg, zrg] <- ra[yrg, xrg, zrg]
  return(rra)
}
> library(png)
> ra <- readPNG("pngimage.png")
> ra1 <- clipRa(ra, 1, 1, 32, 64)
> writePNG(ra1, "clip1.png")
> ra2 <- clipRa(ra, 1, 1, 256, 256)
> writePNG(ra2, "clip2.png")図を画像ファイルに出力する
PNG形式であればpng関数、JPEG形式であればjpeg関数、TIFF形式であればtiff関数を使う。各関数は、いずれも図を描画する際の出力先をファイルに変更する関数であり、図の描画が終わったら、dev.off関数を必ず実行しなければならない。dev.off関数を実行することで、ファイルへの出力が完了する。
出力時の画像の大きさを指定することができる。widthオプションには横方向の大きさ(単位はピクセル)、heightオプションには縦方向の大きさ(同)を指定する。
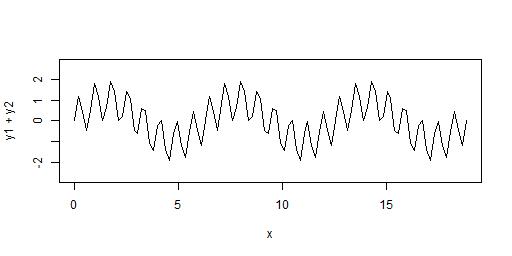
> x <- seq(0, 6 * pi, length = 100)
> y1 <- sin(x)
> y2 <- sin(8 * x)
> png("pngfunc.png", width = 512, height = 256)
> plot(x, y1 + y2, asp = 1., type = "l")
> dev.off()
null device
          1
> jpeg("jpegfunc.jpg", width = 512, height = 256)
> plot(x, y1 + y2, asp = 1., type = "l")
> dev.off()
null device
          1
> tiff("tifffunc.tif", width = 512, height = 256)
> plot(x, y1 + y2, asp = 1., type = "l")
> dev.off()
null device
          1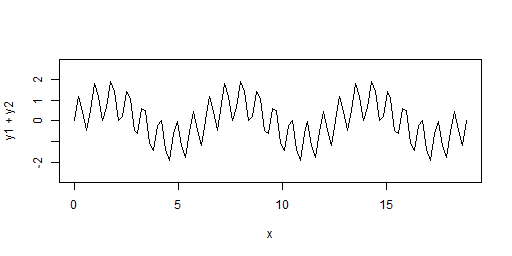
画像の大きさを変える
magickパッケージのimage_resize関数を使う。元の画像をmagick-image型で用意して、この関数に当てはめればよい。
以下は、声優瀬戸麻沙美の公式ウェブサイトのページから画像ファイルをダウンロードしてパソコン内に保存し、その画像の大きさを変えた例。アップロードされているオリジナルの画像(横660ピクセル、縦906ピクセル)を縦横50%ずつ縮めている。~1.pngがオリジナル、~2.pngが縦横50%に縮めた画像。
> library(magick)
> im <- image_read("https://www.starcrew.co.jp/wp-content/uploads/2022/11/TALENT02.jpg")
> print(im)
  format width height colorspace matte filesize density
1   JPEG   660    906       sRGB FALSE   260047   72x72
> image_write(im, "R_magick_SetoAsami1.png")
> im <- image_resize(im, geometry = "50%")
> print(im)
  format width height colorspace matte filesize density
1   JPEG   330    453       sRGB FALSE        0   72x72
> image_write(im, "R_magick_SetoAsami2.png")| imageプラグインエラー : 画像を取得できませんでした。しばらく時間を置いてから再度お試しください。 | imageプラグインエラー : 画像を取得できませんでした。しばらく時間を置いてから再度お試しください。 |
無地の画像を作成する
magickパッケージのimage_blank関数を使う。colorオプションにnoneを指定する。戻り値はmagick-image型。これを画像ファイルに出力するには、image_write関数を使う。以下は、大きさの違う無地と黄色一色の画像を作成してファイルに出力した例。
> library(magick)
> im <- image_blank(128, 256, color = "none")
> image_write(im, "R_magick_image_blank1.png")
> im <- image_blank(256, 128, color = "yellow")
> image_write(im, "R_magick_image_blank2.png")
> typeof(im)
[1] "externalptr"
> class(im)
[1] "magick-image"| R_magick_image_blank1.png | R_magick_image_blank2.png |
インターネット上の画像をダウンロードする
magickパッケージのimage_read関数を使う。URLを指定して読み込むと、magick-image型で入手できる。これを画像ファイルに保存するには、image_write関数を使う。
以下は、声優石見舞菜香の所属する事務所の公式ウェブサイトから、当人の画像ファイルをダウンロードして、自分のパソコンにその画像をPNG形式で保存した例。
> library(magick)
> im <- image_read("https://www.raccoon-dog.co.jp/talent/talentpic/r10.jpg")
> class(im)
[1] "magick-image"
> print(im)
  format width height colorspace matte filesize density
1   JPEG   300    400       sRGB FALSE   125201   72x72
> image_write(im, "R_magick_IwamiManaka.png")
> fl <- list.files(".", "R_magick_IwamiManaka\\.png")
> file.info(fl)[c(1, 2, 4)]
                           size isdir               mtime
R_magick_IwamiManaka.png 129884 FALSE 2025-01-29 21:33:30
imageプラグインエラー : ご指定のファイルが見つかりません。ファイル名を確認して、再度指定してください。 (R_magick_IwamiManaka.png)
