“Hey, hey there! Welcome to my f-f-floor.”
| + | Contents |
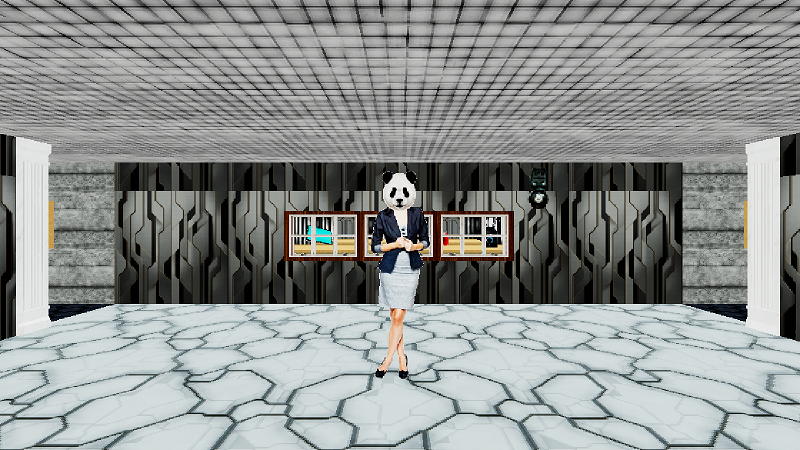
Overview
Level Explanation:
| LEVEL: | SCIENCE |
| 3RD GRADE: | HIGH SCHOOL |
| TEACHER: | EMMA BATHSHEBA |
| DESCRIPTION: | Emma is a panda, since child she really loved Science and Chemistry! She has impressive abilities and can make you go REALLY dizzy, beware, high school isn't easy. |
Unofficial Difficulty Chart:
| Boi Mode | ★☆☆☆☆ |
| Default Mode | ★★☆☆☆ |
| Brainiac Mode | ★★★★☆ |
- Science Level is the third level of this game.
- The subject is science, and the teacher is Emma Bathsheba.
- This level differs from the previous Language Level in various ways, with some elements being more challenging, but the overall difficulty is moderate. Players who have cleared the previous level should be able to clear this one without much difficulty.
- Unlike previous levels, this level has more original elements than those influenced by AEwVS, making it completely different from AEwVS's History Level.
- One notable feature is that elements emphasizing the science theme are scattered throughout.
Characters Appearing
- Emma Bathsheba
- Jimmy
- Samara
- Principal
- Kittie
- Nurse (in the remastered version version 1.2 and later)
Items Appearing
- Soda
- Chocolate bar
- Chips
- 1 cent
- 25 cent
- 50 cent
- Lockpick
- Bottle of poison
- Tuna fish
- Blue door key
- Medical Equipment (only in the remastered version version 1.2)
- Teleporter (Remastered version 1.2 and later)
- Mystery book (Remastered version 1.23 and later)
- Cookie (Remastered version 1.4.0 and later)
- Donut (Remastered version 1.4.0 and later)
- Sketch Map (Remastered version 1.4.0 and later)
Notebook
| + | Image Included |

- Using the notebook displays four input fields and one chemical formula for a compound.
- Players must create potions by entering letters and numbers that match the displayed chemical formula.
- Specifically, the symbol part of the chemical formula must be entered in the left input form, the coefficient part in the right input form, the elements on the left side of the chemical formula in the upper part, and the elements on the right side in the lower part.
- In the example image, “N” must be entered in the upper left, “2” in the upper right, ‘O’ in the lower left, and “5” in the lower right.
- Pressing the CHECK button will determine whether the answer is correct or incorrect, and the next question will be displayed. Once all questions have been answered, the notebook can be collected.
- The difficulty level of the questions does not change, but as the difficulty level increases, the number of questions that must be answered also increases.
- The number of questions is 3 in Boi mode, 5 in Default mode, and 8 in Brainiac mode.
- Note that the final question in the notebook always presents the chemical formula CF4. CF4 refers to carbon tetrafluoride, which is a greenhouse gas and cannot be turned into a potion, so no matter how you answer, it will always be marked as incorrect. (*1)
- While not as much as last time, solving the notebook still takes a considerable amount of time (especially in Brainiac Mode), so it is best to solve it after creating a sufficient distance from the teacher.
- By pressing the TAB key, you can change the input target from top right to top left to bottom left to bottom right, so using this feature can reduce the time it takes to solve the notebook. For example, if the answer is H2O, you can solve the problem by clicking the top-right corner → entering 2 → pressing the TAB key → entering H → pressing the TAB key → entering O → pressing the TAB key → entering 1 → pressing the CHECK button. This reduces the time spent aligning the mouse cursor with the form and switching between the mouse and keyboard, significantly cutting down the time required to solve the notebook.
- However, this technique is quite difficult to master, and if you are not used to it, it may be faster to do it the normal way, or you may make mistakes. At difficulty levels below Default, the difficulty settings are such that you can clear the game without using this technique, so there is no need to force yourself to use this technique when challenging these difficulty levels. On the other hand, in Brainiac mode, it will be quite difficult to win without using this technique, so it is a good idea to try to master it.
Gallery
| + | Image Included |


Audio
| + | Audio Included |
Strategy
| + | Map Image |

| + | Walkthrough Video |
- The general flow of the level is almost the same as before. When the level starts, go to the classroom and solve the notebook.
- There is also something like a mixer in the classroom, but there is no particular use for it at first, so ignore it.
- This level is similar to the previous one in terms of the range of darkness and the lack of guidance, but the map is not as complex or vast as the previous one, so it should be fairly easy to memorize after a few attempts.
- However, the enemies' movement range is also narrower, and the map's structure is designed as a single long corridor with classrooms and hallways branching off from it, making encounters and collisions with enemy characters more likely. Countermeasures are particularly important for certain characters (as described later).
- As before, if you can't memorize the map, using Puss Mode is a viable option.
- The characters that appear are the same as before, except for the teacher. Continue to use the same countermeasures as before.
- However, there seems to be a bug with Principal where the switch between Lesson Time and Break Time does not work properly at this level, and if you commit a rule violation during Break Time, you will almost certainly be taken away. For this reason, it is best to avoid running or similar actions at this level.
- However, this bug has been fixed in version 1.4.0 of the remastered version, so there is no need to worry about it in the latest remastered version.
- Additionally, there is a bug where Kittie gets stuck in the room where she appears, and she won't come out unless the door is intentionally opened or Principal accidentally opens it. Since the latter is highly unlikely to occur, Kittie is effectively useless as a threat at this level.
What a buggy- Incidentally, this bug occurred in version 1.1.0. It did not occur in earlier versions, so it is very puzzling why it happened. Additionally, it has not been fixed in the remastered version.
- However, there seems to be a bug with Principal where the switch between Lesson Time and Break Time does not work properly at this level, and if you commit a rule violation during Break Time, you will almost certainly be taken away. For this reason, it is best to avoid running or similar actions at this level.
- Emma, the teacher at this level, moves like Angelica Wilkins and has the ability to confuse the consciousness of those nearby. When she is nearby, noise and warnings appear on the screen.
- However, this is just a visual effect and has no further impact. Therefore, there is no need to panic; instead, you can use it as a sign that she is approaching. If noise and warnings appear, she is already nearby, so be careful when moving.
- The real threat lies in her movement speed and how difficult it is to outmaneuver her. She boasts the second-fastest movement speed after Angelica, and since solving the notebook takes time, she can easily catch up while you're solving it. Furthermore, at this level, there is a defensive item like Chicken or Dog Beef, the Bottle of Poison, but using it will not cause her to retreat; it can only delay her for a short time. Therefore, the strategy of using defensive items to create distance and ensure long-term safety no longer works, and the only way to create distance is to flee.
- However, the time you can stall her is quite short, and even in Default mode, it is quite difficult to finish a notebook while stalling her, and if you try to do so in Brainiac mode, she will catch up with you.
- Also, she has a large hitbox, so be careful as she will kill you even through walls if you get too close to her.
- Unlike previous teachers, there is no ability unlocked by collecting a certain number of notebooks, but by the end of the game, her tracking speed becomes quite fast, so the difficulty remains high.
- When moving or escaping in this level, it is strongly recommended to move as much as possible in a counterclockwise direction (see the diagram below). This is because you can move in the same direction as Jimmy.
- As mentioned earlier, this level is structured like a long corridor with classrooms and hallways branching off from it. When moving, you will often walk along this long corridor, and Jimmy also moves in a certain direction along this long corridor most of the time. By moving in the same direction as him, you can not only avoid collisions from the front but also move quickly by having him push you from behind, giving you a significant advantage.
- Conversely, moving in the opposite direction risks being collided with by Jimmy from the front, which is quite dangerous. In wide areas, you can sometimes avoid collisions by changing your path, but collisions at narrow points or doors are difficult to avoid.
| + | Counterclockwise movement path(image included) |

- Due to the level structure and the teacher's tracking speed mentioned earlier, you will basically have to circle the long hallway multiple times to gain distance from the teacher.
- Therefore, if there are items you want to pick up but cannot carry, you can remember the location and pick them up the next time you come there.
- If it is difficult to remember, it may be a good idea to place the picked-up items in one place. However, it is advisable to carry at least one item that is essential for survival, such as a Bottle of poison or Tuna fish, to prevent accidental death. Also, if the Principal sees you placing items, you may be taken away, so if you do this, do it in a classroom where you are less likely to be seen.
- As mentioned earlier, this level has an item called Bottle of Poison, which can be used as a defensive item against teachers. It is a small bottle containing green liquid, and while it cannot make teachers retreat, it can delay them for a certain amount of time. This item is particularly useful in the latter stages of the game, so be sure not to overlook it.
- However, unlike Dog Beef from the previous game, this item is on the blacklist, and if you are caught holding it by the Principal, you will be taken away and it will be confiscated, so try not to hold it as much as possible.
- Like Dog Beef, it can only be used three times, but if you use it a fourth time, the teacher will instantly kill you instead of chasing you at high speed, leaving you no chance to escape. Moreover, even if you enter the final chase, the teacher will instantly kill you without hesitation, so using it a fourth time effectively means game over. Therefore, you must never use it a fourth time. Be careful.
- In this level, there is a room that appears to be a laboratory with a sign that says “DANGER” in red letters. This room is filled with black potions, which are harmless to touch, but if you examine them, you will die instantly, so be careful.
- Although this laboratory is located along the hallway, there is nothing particularly noteworthy inside, so it is best to pass through quickly.
- Incidentally, there is a yellow board with a warning at the entrance to this room, adding to the Science Level atmosphere.
- The Blue door key for this level is located in a locker inside Classroom 1102, which is reached by going left from the starting point and passing through the door labeled “Hallway.”
- This item is not very useful in other levels, but it is quite important in this level. This is because there is a room that requires this key to enter, even though there is a possibility that a notebook will be placed there. That room is located near the door with a blue lock mark, and it is possible that you will not be able to obtain the notebook because you do not have the key.
- For this reason, Lockpick is also important in this level. While collecting notebooks, it's a good idea to collect Lockpick as well. However, this item is on the blacklist, and if you're seen holding it by the Principal, you'll be taken away. It's best to keep one slot free for an item not on the blacklist or leave it empty.
- Note that the placement of notebooks in this room is random, so it is possible to collect all notebooks even without a key. Additionally, Emma can open doors, so you can position yourself in front of the door to attract her, then use the Bottle of Poison when she charges in to disable her while opening the door. However, the disabling effect is quite short-lived, so if you use this method, it's best to collect all other notebooks beforehand and repeatedly press the CHECK button without answering to retrieve the notebooks.
- In the remastered version, you can purchase keys from the Store and bring them with you, but they are quite expensive, so it might be better to refrain from doing so until you reach a level where you can clear the game.
- This item is not very useful in other levels, but it is quite important in this level. This is because there is a room that requires this key to enter, even though there is a possibility that a notebook will be placed there. That room is located near the door with a blue lock mark, and it is possible that you will not be able to obtain the notebook because you do not have the key.
- Unlike previous levels, there is no “19” room where the 20th notebook is guaranteed to be placed, and all 20 notebooks are randomly placed throughout the level. Therefore, the order in which you collect the notebooks is completely up to you.
- Once you collect all 20 notebooks, you will enter the final chase with the teacher, as before. Emma says she is fed up with you but cannot escape, and declares that she will give you a “final test of cleverness tenderness”. After that, she resumes her pursuit at full speed when the BGM starts playing.
- However, unlike previous final chases, you cannot clear this one by simply fleeing into the elevator. In this final chase, you must evade her while collecting five potions to activate the elevator. The potions appear in certain classrooms within the level after the final chase begins.
- The teacher's pursuit speed is not that fast, so you can easily outpace her by running for a while. However, the issue is that it is difficult to detect her approach. During the Final Chase, the BGM plays at high volume, making it nearly impossible to hear footsteps. You can only detect her approach by visually confirming her or the noise. Additionally, since her pursuit speed is fast, it's common for her to catch up within a few seconds of seeing the noise. Therefore, relying solely on the noise is risky, and you should primarily detect her approach by visually confirming her. Avoid letting the distance between you grow too large, and periodically stop to reconfirm where she is.
- In this level, there are many hallways, so it is not difficult to spot her, but in areas with paths other than front and back, she may approach from an unexpected path and ambush you, so it is best to confirm her location in areas with no paths other than front and back.
- During the final chase, the potion count will be displayed in the upper right corner of the screen as “0/5 Potions,” so collect potions until it reaches 5/5. All potions appear in a specific classroom, so if you don't know the location, open all the classroom doors one by one.
- Once you have collected all 5 potions, return to the greeting room. You will need to perform a certain task in the greeting room, so it is best to keep your distance and avoid being caught while you do so.
- After collecting all 5 potions, you will need to examine the mixer in the greeting room. When you inspect the mixer, the five potions you collected will be displayed, so click on all of them and then press the “CHECK” button. You will then obtain the “Elevator oil” item, so head to the elevator as fast as you can. Pressing the elevator button in this state will safely activate the elevator, and at the same time, the BGM will stop, Emma's anger will subside, and the pursuit will cease. Pressing the up arrow button on the elevator in this state will close the elevator doors, completing the level.
- In the remastered version, while the teacher's appearance and BGM have been changed, the level textures remain unchanged, so the overall atmosphere is quite similar to the classic version.
- In particular, the BGM that plays after answering a question incorrectly has not been changed, so you can play with a similar feel to the classic version.
- Like other levels, a Nurse was added to the treatment room in version 1.2 of the remastered version.
- In version 1.23 of the remastered version, the room with the blue lock icon became a secret room that can be opened with the Blue Door Key.
- Like other levels, there is a Mystery Book inside, which reveals Emma's secret.
Side Note
- In the classic version up to version 1.0.0, there was an Easter egg of the internet meme “Happy Happy Cat” inside the locked room where Kittie appears.
- However, it was mysteriously removed in version 1.1.0, leaving a slightly empty feeling. As a replacement, the wall of the former location now features the phrase “Mew mew! I'm hungry!” written as if scratched with claws. Considering it's Kittie's appearance location, did he write it?
