"Hey! Welcome student."
| + | Contents |
Overview
Level Explanation:
| LEVEL | MUSIC |
| 4TH GRADE | HIGH SCHOOL |
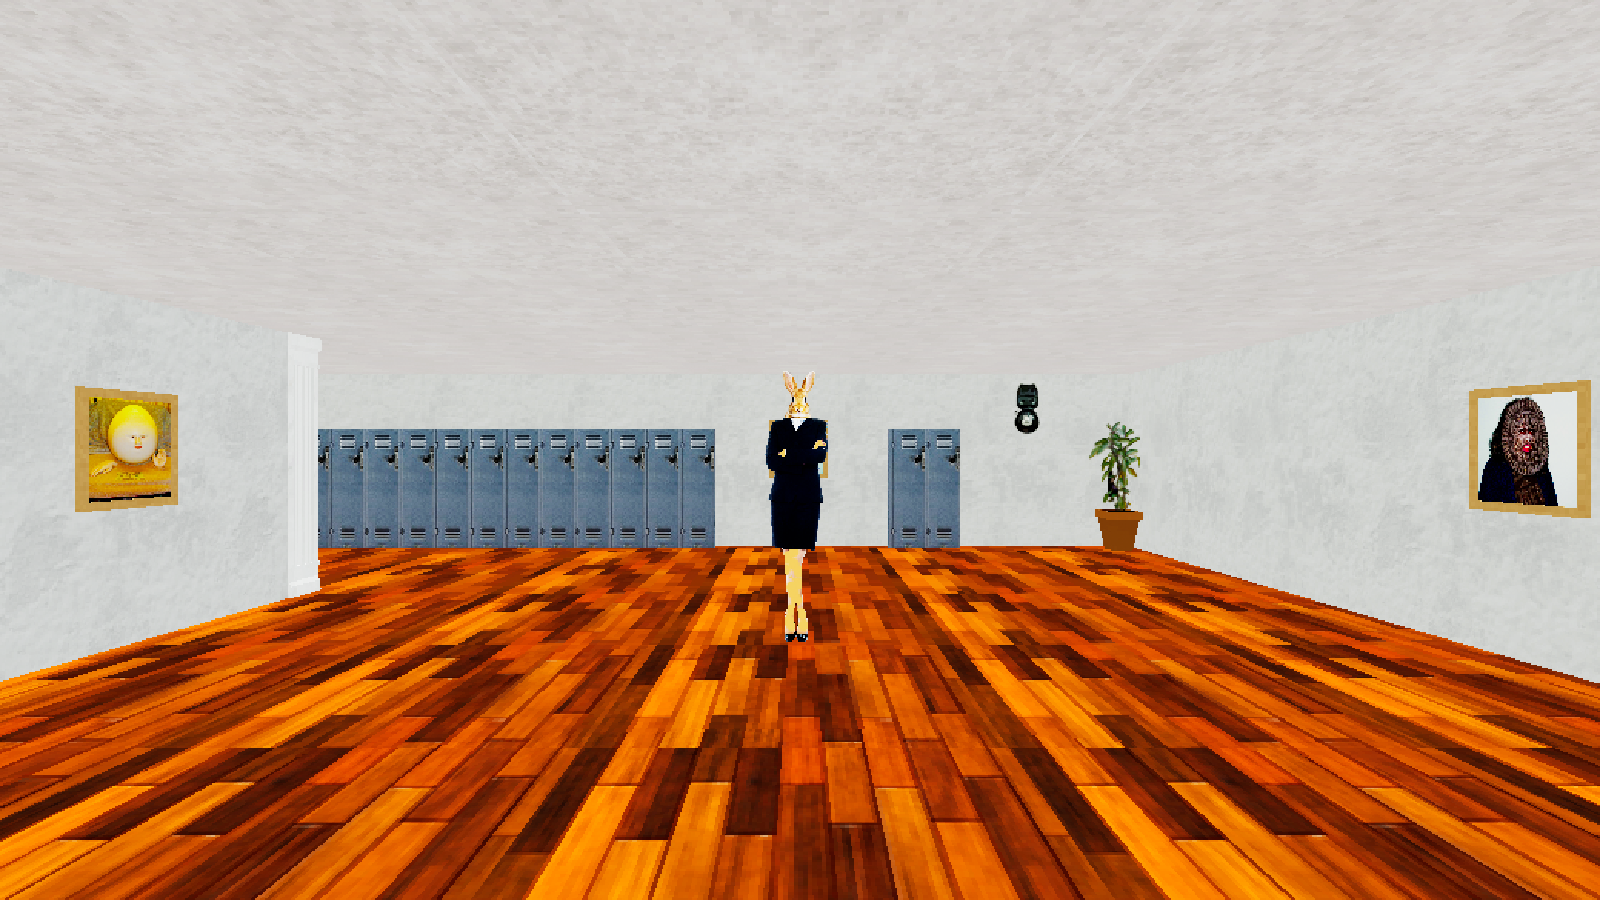
| TEACHER | SOPHIE ADELBERT |
| DESCRIPTION | Sophie is the rudest rabbit you could've ever meet, she is really aggressive towards students. She's obsessed with music. Please don't piss her off. Just don't. |
Unofficial Difficulty Chart:
| Boi Mode | ★★☆☆☆ |
| Default Mode | ★★★☆☆ |
| Brainiac Mode | ★★★★★ |
- Music Level is the fourth level in this game and the final normal level in Story Mode.
- The subject is music, taught by Sophie Adelbert.
- As the final normal level in Story Mode, it features a vast and complex map, troublesome enemy characters, notebooks that force prolonged confinement, and a teacher whose synergy with these elements creates an overwhelmingly difficult experience. It boasts an extremely high difficulty level, arguably the hardest yet.
- Brainiac Mode is especially brutal, with every element amplified to insane levels. Even compared to other Brainiac Mode levels, it stands apart with its transcendentally high difficulty.
- It's also notable for its Music Level-appropriate touches, like instruments scattered throughout and what appears to be a performance-specific area in one location.
- This makes it not just hard, but a level with a fresh atmosphere unlike anything before.
- In the remastered version, the Teacher's appearance, most BGM, and textures remain unchanged, preserving an atmosphere close to the classic version.
- However, the remastered version removed the decorative musical instruments found throughout. Why they made this downgrading change is unclear.
Characters Appearing
- Sophie Adelbert
- Jimmy
- Samara
- Principal
- Kittie
- Ertoo Walkatosia
- Nurse (Version 1.2 and later of the remastered version)
Items Appearing
- Soda
- Chocolate bar
- Chips
- 1 cent
- 25 cent
- 50 cent
- Lockpick
- Chicken
- Carrot
- Tuna fish
- Rusty fork (changed to "Fork" in the remastered version)
- Medical Equipment (only in remastered version 1.2)
- Teleporter (in remastered version 1.2 and later)
- Mystery book (in remastered version 1.2.3 and later)
- Blue door key (in remastered version 1.2.3 and later)
- Cookie (in remastered version 1.4.0 and later)
- Donut (in remastered version 1.4.0 and later)
- Sketch Map (in remastered version 1.4.0 and later)
- Apple? (in remastered version 1.4.2 and later)
Notebook
| + | Image Included |

- Using the notebook displays a piano keyboard.
- At the start of each problem, multiple piano notes sound randomly. Players must then click the keys to reproduce the same sequence of notes.
- The corresponding key darkens when its note sounds, so musical ability isn't required. Focus on the keys to identify which notes played.
- Note that no half-steps are selected among the sounds. Therefore, you can safely ignore the black keys.
- Only the first notebook includes an instructor's explanation inserted before the first problem.
- While this seems standard, this explanation cannot be skipped and the problem won't start until it finishes, so players need to wait a short while.
- The explanation itself is brief, and piano sounds start playing immediately afterward, so it's not recommended to completely look away and leave it unattended. While waiting, kill time by checking this wiki on your phone
- Once the piano sounds finish playing, the correctness check occurs when the number of keys clicked equals the number of notes played, and you proceed to the next problem.
- Note that player input is not accepted while the piano sounds are playing, so unlike before, you cannot repeatedly answer without input and immediately retrieve the notebook . Therefore, be extremely careful: if you don't use the notebook after sufficiently distancing yourself from the teacher, you'll be helplessly defeated.
- The piano sounds are designed to play a set number of times within a fixed timeframe. This number varies by difficulty level; higher difficulty means more notes sound at faster intervals.
- Specifically: 2 notes in Boi Mode, 4 notes in Default Mode, and 6 notes in Brainiac Mode.
Gallery
| + | Image Included |


Audio
| + | Audio Included |
Strategy
| + | Map Image |

| + | Walkthrough Video |
- First, unlike previous levels, the “Teachers stop moving” option is unavailable. Players accustomed to using this option should strive to adapt to solving the notebook while being chased by teachers.
- Given the level's nature, enabling it would likely make this stage much easier to clear. Perhaps it was disabled to prevent it becoming too simple?
- Note: Attempting to use the Notebook Time Stop Glitch here will completely freeze the game and cause a deadlock. Since both glitches involve identical processing, it's only natural bugs occur when the implementation isn't prepared. This suggests the notebook's nature made implementation difficult, leading to the entire option being removed. Only the developers know the true reason.
- The general flow remains unchanged from last time. When the level starts, go to the classroom and solve the notebook.
- While the area of darkness in this level is the same as last time, the map is extremely vast and complexly intertwined. Therefore, you'll struggle even with exploration until you memorize the map.
- The map size is larger than that of Language Level, making clearing it without memorizing the layout quite challenging. First, memorize the location of Samara's room, then try to memorize the entire map. Fortunately, there are relatively many guidance points; use these to help you memorize.
- As before, if you can't memorize the map, using Puss Mode is a great option. For the remastered version, utilizing the Sketch Map is also a good idea.
- This level introduces a new character, Ertoo Walkatosia. Ertoo is a steel robot-like character who, upon spotting you, will run over and ask you to help clear the school's Wi-Fi cache.
- During the task, red objects representing cache and green objects representing the system will appear in chains. Clearing all cache or accidentally clearing the system will release you from the task. However, if you accidentally delete the system, you'll be treated as if you destroyed it, and Principal will come rushing over and take you away just like when you break school rules. Additionally, if the system is destroyed and some functions become unavailable, you won't be able to use items for a while. It's mystery why chocolate becomes inedible when the Wi-Fi is destroyed
- Once captured by Ertoo until you're freed from the task, you cannot move at all, potentially plunging you into a sudden crisis depending on the situation.
- Fortunately, Ertoo's pursuit speed isn't that fast, and you can easily outrun it by sprinting. So, if you're spotted by Ertoo while the teacher is nearby, it's best to run to create distance from the teacher first, then deal with Ertoo.
- If the teacher closes in on you while solving Ertoo, deliberately shutting down the system to escape is a perfectly viable option. There will be penalties, but worrying about them and dying would defeat the whole purpose. In this situation, it's wise to create some distance from the teacher while starting to solve a notebook before Principal catches you. Getting taken away by the Principal while solving the notebook allows you to escape the teacher while solving it. Solving the notebook during the time you're restrained lets you make effective use of that time.
- Before the cache cleaner appears, you can use items, so in the remastered version, using the Teleporter might be effective in some situations.
- The number of caches you must delete depends on the difficulty, but no matter the difficulty, the more times you get caught, the more it increases meaning you'll be pushed into an increasingly desperate situation.
- Therefore, you must avoid being spotted as much as possible. However, as usual, he also has long-range vision in all directions, so you often find yourself in hopeless situations. Additionally, towards the end, the Principal's speed increases, meaning getting caught by Ertoo often guarantees immediate arrest by the Principal. Consequently, recklessly racking up more rule violations can lead to an Ertoo combo that leaves you helplessly defeated. Incidentally, Ertoo can still track you normally even while you're being escorted by the Principal for rule violations—leaving you virtually defenseless against Ertoo during this period. Given these circumstances, you must be even more cautious about rule violations than in previous levels.
- Characters introduced so far (excluding teachers) will continue to appear, so maintain the same countermeasures as before.
- Similar to last time, Principal seems to have a bug at this level where switching between Lesson Time and Break Time doesn't work properly. This means violating rules during Break Time will almost certainly get you taken away. Considering the Ertoo issue mentioned earlier, it's best to avoid actions like running whenever possible. However, this level features a vast and complex map, making encounters with the Principal quite rare. When running or similar actions are necessary, feel free to do so without hesitation.
- In the remastered version, this bug was fixed in version 1.4.0, so it's no longer a concern.
- Similar to last time, Principal seems to have a bug at this level where switching between Lesson Time and Break Time doesn't work properly. This means violating rules during Break Time will almost certainly get you taken away. Considering the Ertoo issue mentioned earlier, it's best to avoid actions like running whenever possible. However, this level features a vast and complex map, making encounters with the Principal quite rare. When running or similar actions are necessary, feel free to do so without hesitation.
- Sophie, the teacher in this level, moves constantly like Lucas but possesses no special traits or abilities. In fact, her movement speed is quite slow, and her footsteps are easily audible. Therefore, her individual abilities aren't particularly formidable.
- However, this level features numerous elements designed to slow you down, such as prolonged confinement via the notebook and persistent interference from disruptive characters like Kittie and Ertoo. This alone makes her a more than sufficient threat. Regarding the latter, even with Samara present, the vast map and the time required to solve notebooks force players to make multiple long-distance trips back and forth. This setup actually increases the likelihood of encountering them. In this way, every element of the level synergizes with her, presenting a simple yet fitting final threat worthy of standing before the player as the last Teacher.
- In Brainiac Mode, her movement speed increases significantly and her footsteps become quieter, further amplifying her threat level.
- Note that, like Emma previously, her hitbox is quite large, and she can kill you even through walls, so be cautious.
- Similar to the Bottle of Poison from last time, there is a defensive item against the Teacher called the Carrot. Its effect is nearly identical, allowing you to stall the Teacher, so pick it up whenever you find it.
- The limitations remain unchanged: it cannot force the Principal to retreat, and it only works up to three times. As before, using it a fourth time effectively means game over, so be extremely cautious. However, unlike last time, this item is not blacklisted, so carrying it won't get you taken away by the Principal. That's one thing you can feel safe about.
- However, due to the nature of the notebooks this time, you cannot spam answers recklessly while the Principal is delayed to quickly collect all the notebooks. Also, just like last time, the duration you can stall them is quite short. In Default mode, if you push hard, you might barely manage to solve one notebook while stalling them, but in Brainiac mode, it's basically impossible. Because of this, the opportunities to use it are quite limited. Still, it can help you avoid her in narrow hallways or rooms, or prevent accidents where you come into contact with the teacher while being carried by Jimmy. It's a good idea to carry one. Its presence can mean the difference between life and death. Especially if you're being carried by Jimmy while the Teacher is nearby, spam its use relentlessly.
- No matter what you do, solving notebooks takes an extremely long time in this level. If you haven't put enough distance between yourself and the Teacher before solving a notebook, you'll be helplessly caught while solving it. Early on, the teacher moves very slowly, so you can safely solve it even within earshot if you maintain a slight distance. However, the teacher's speed increases significantly as you progress. By the end, even if you pull far enough away that you can't hear footsteps at all, you might still get caught before finishing depending on the distance.
- Mastering this area relies heavily on feel, so it's best to attempt it multiple times to get a sense for it. Alternatively, several walkthrough videos for this level are already available online, which you can watch for reference.
- This level has one Break Room each in Corpus A and B. These rooms contain large amounts of discarded Foil, which seems significant, but they hold nothing of particular importance and no notebooks are placed there, so they can be safely ignored for the walkthrough.
- Corpus A has a white room labeled “Room.” This room always contains a Lockpick and a Rusty fork. These also seem somewhat significant, but neither is useful at all, so you can safely ignore them. However, the room itself can be used as a convenient shortcut to other areas, so it's good to remember its location.
- In the remastered version, the Rusty fork was replaced with a Fork, but it remains completely useless. On the other hand, the Lockpick gained a purpose due to the addition of a secret room (details below), so you should come here to retrieve it when needed.
- Near Samara's room is a room marked in red with DANGER. Entering this room triggers loud noise, and proceeding further leads to an infinitely long corridor. This also looks very significant, but as usual, there's nothing special here, so ignore it during your playthrough. There are way too many things that look significant but turn out to be nothing.
- Incidentally, this corridor technically ends in a dead end. However, it combines a looping mechanism that returns you to a certain point once you pass a specific location with complete darkness to create the illusion of endlessness. This is easier to see when playing in Puss Mode.
- As before, this level lacks a room labeled “19.” All 20 notebooks are randomly placed throughout the area. Therefore, you can freely decide the order in which to collect them, just like last time.
- Collecting all 20 notebooks triggers the final chase with the teacher, just like last time. Sophie declares it's not over yet, announcing “the ultimate test of dexterity and sensitivity.” BGM then begins, and at its climax, she resumes pursuit at breakneck speed.
- True to the teacher's declaration, this final chase is a more difficult version of the previous one. You must collect five musical notes that appear at specific positions on the level and input the corresponding musical scale displayed when collected into the elevator panel.
- Her pursuit speed remains unchanged, not particularly fast, so you can easily pull away after running a bit, just like last time. The problem is that it's even harder to notice her approaching than before. As usual, the loud BGM makes hearing footsteps nearly impossible. Furthermore, there are absolutely no other indicators of her approach, like Emma's noise. Therefore, you can only detect her approach by seeing her. To make matters worse, unlike the previous level with its mostly straight corridors, this one is complex and winding. If you flee recklessly, she'll often circle around unexpectedly and ambush you from an unanticipated route. Therefore, it's crucial to avoid pulling too far ahead and to stop periodically to reconfirm her location, even more so than last time.
- As before, all collectible notes appear at fixed positions. However, unlike the previous level, the map is extremely vast, making it a grueling battle until you memorize the locations. If you haven't memorized or can't memorize the locations, keeping three points in mind will make things considerably easier: all notes appear inside classrooms, 4 appear in Corpus A and 1 in Corpus B, and they never appear in classrooms located in dead ends where you need to backtrack.
- Unlike last time, this time you not only collect notes but also need to input the displayed scale into the elevator when collected. Forgetting this makes clearing the stage considerably harder. Therefore, some kind of countermeasure is advisable.
- Taking notes is a good idea, but you cannot open the pause menu during the Final Chase. In this case, you need to skillfully create distance to take notes and resume your escape before being caught up. The controls themselves aren't difficult, but it's easy to panic. If you dislike that, constantly repeat saying all the scales you've heard so far. However, if people are around, you'll definitely get weird looks, so do this when you're alone.
- Once you've collected all the notes, head to the elevator and input all the scales into the panel. Note that you should input the scales in the order you heard them from above, regardless of the note colors. You can re-enter them if you make a mistake, but the Greeting Room with the elevator is a dead end. You'll need to skillfully dodge the approaching Sophie, so it's best to get it right on the first try.
- Once you correctly input all the notes into the panel, a bell rings, the BGM stops, Sophie's anger subsides, and she stops chasing you. Press the elevator's up arrow button in this state to close the doors and clear the level.
- Incidentally, the Blue door key is, unbelievably, not present in this level.
so utterly useless it was finally forgotten?Having been given almost no purpose up until now, to be completely erased from existence at this point is truly pitiful.At this point, the creator might genuinely have had their parents killed by this key- As mentioned later, it was given a role in the remastered version and successfully made a comeback.
- As described in the overview, the remastered version retains the classic look for the teacher's appearance, most BGM, and textures, so the overall atmosphere remains close to the original. However, the decorative musical instruments scattered throughout have been removed, resulting in a slight downgrade in presentation.
- In Remastered Version 1.2, a surgery room was added to Corpus A, along with a Nurse like in other levels.
- In Remastered Version 1.2.3, a secret room was added to the back level. Additionally, a locker containing the Blue door key was added to the break room right after entering Corpus B.
- As before, the secret room contains a Mystery book detailing Sophie's secret. Opening this room's door requires the Blue door key, finally giving this damn pitiful key a chance to shine.
- In version 1.4.2 of the remastered version, an Apple was apparently added as a hidden item. Information requested.
Side Note
- Actually, this level underwent difficulty adjustments in version beta0.2.0. In its initial release, beta0.1.0, the difficulty settings differed from the current ones.
- Specifically, instead of Ertoo Walkatosia, the number of sounds played for each problem in the notebook was set to 3 in Boi mode, 5 in Default mode, and 8 in Brainiac mode. Since the notebook requires playing all set sounds within a fixed time limit, Brainiac mode not only had the most sounds but also an abnormally fast playback speed, making it nearly impossible to keep track without taking notes.
